Introduction - what are spritesheets?
Most of Flash games use a technique called "sprites" or "spritesheets" for animating moving objects (characters, vehicles, bullets etc). This technique has been around since 1980's, when 8-bit computers like Commodore 64 or Atari had hardware that supported sprites.
Sprites are bitmap images - where every pixel is represented by number that determines its color. To move sprites around the screen or change the frame, a small block of memory is moved (without any calulations) - from the invisible source to the place where the image needs to be. ActionScript 3 can do it with just one transaction! Because this animation method is very robust (the processor needs very little time to copy a part of the image to the screen), it's still widely used today. A different method - vector graphics (where images are stored as a set of line coordinates - is much better for precise scaling and rotating objects, but this is not needed in most of Flash programs. Vector graphics is usually much slower than bitmaps.
Spritesheets are basically bitmap images with multiple frames of the same object, each slightly different than the previous one. Just like the old-fashioned movie films. If you display one frame after another in the same place of the screen, one frame at a time, it creates the animation effect.
Here is the spritesheet that we will use - a wide transparent PNG image with 8 frames, each of them 300x200 pixels:

Step 1 - Empty shell
We always start an AS3 program with an empty shell. If you don't know what the code below means, don't worry. Focus instead on what will be happening inside the main function. You can write a lot of programs before you need to exactly understand the structure of the shell. But in case you're curious, the quick summary is that the main function "tutorial" in contained in a class (also named "tutorial"), which is contained in a package.
package {
import flash.display.Sprite;
public class tutorial extends Sprite {
public function tutorial()
{
}
}
}
Step 2 - Imports
We already imported one standard class ("Sprite") in the first step. Now let's import all the other ones that we will need. This is again just a technical step that you don't have to understand right now. The code added in this step is highlighted in blue:
package {
import flash.display.Sprite;
import flash.display.Bitmap;
import flash.display.BitmapData;
import flash.display.Loader;
import flash.geom.Rectangle;
import flash.geom.Point;
import flash.net.URLRequest;
import flash.events.*;
public class tutorial extends Sprite {
public function tutorial()
{
}
}
}
Step 3 - Loader
The loader will be the object that allows us to load the image from the external file.
We're declaring the variable, and then loading the image file (sprite.png - it has to be in the same folder as the compiled program [swf file]) and finally adding the object to the screen - these are the first 2 lines of code in our program that actually "do something" and finally give us something that we can see!
package {
import flash.display.Sprite;
import flash.display.Bitmap;
import flash.display.BitmapData;
import flash.display.Loader;
import flash.geom.Rectangle;
import flash.geom.Point;
import flash.net.URLRequest;
import flash.events.*;
public class tutorial extends Sprite {
public var myLoader:Loader = new Loader();
public function tutorial()
{
myLoader.load(new URLRequest("sprite.png"));
addChild(myLoader);
}
}
}
If you compile the program and open it, you should see something like this:
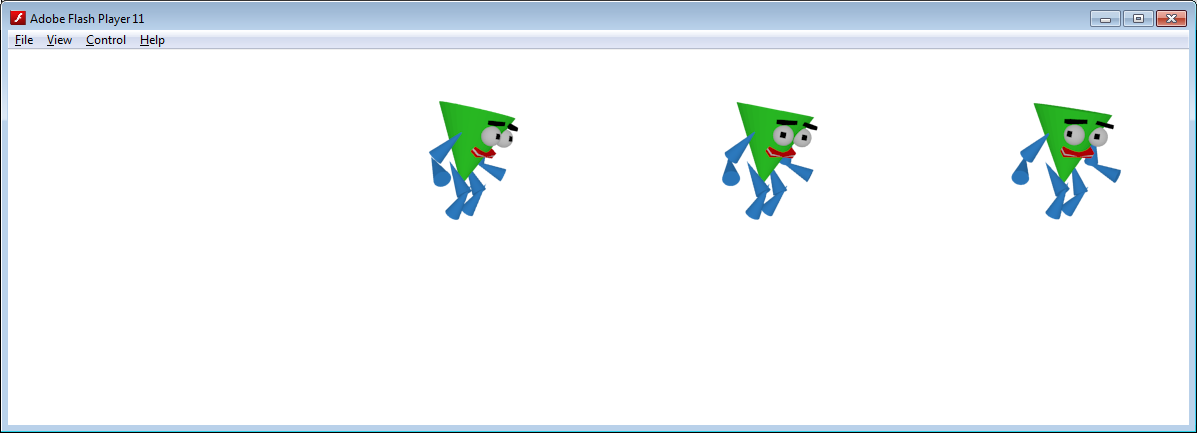
In a real game, you would never show all frames at the same time - they are shown here only for demonstration purposes.
Step 4 - Bitmap and BitmapData
Here is where the hard part begins! We have two create four new objects: 2 Bitmaps (named sourceBMP and targetBMP) and 2 BitmapDatas (sourceBD and targetBD).
One Bitmap and BitmapData are the source, the other ones are the target. The source has to contain all eight frames, so it is wider. The target will only display one frame at a time (the current animation frame), so it has the width of one frame.
We place the target below the myLoader by changing its Y coordinate to 250.
The function that we will later use to copy frames can only copy from one Bitmap Data to another Bitmap Data. If we could copy frames directly from myLoader, we wouldn't need the sourceBMP and sourceBD.
Because the target does not have any image yet, you will not see any difference from the previous step if you execute the program now.
package {
import flash.display.Sprite;
import flash.display.Bitmap;
import flash.display.BitmapData;
import flash.display.Loader;
import flash.geom.Rectangle;
import flash.geom.Point;
import flash.net.URLRequest;
import flash.events.*;
public class tutorial extends Sprite {
public var sourceBD:BitmapData = new BitmapData(300*8, 200, true);
public var sourceBMP:Bitmap = new Bitmap(sourceBD);
public var targetBD:BitmapData = new BitmapData(300, 200, true);
public var targetBMP:Bitmap = new Bitmap(targetBD);
public var myLoader:Loader = new Loader();
public function tutorial()
{
addChild(targetBMP);
targetBMP.y=250;
myLoader.load(new URLRequest("sprite.png"));
addChild(myLoader);
}
}
}
Step 5 - Copy the Loader to the source Bitmap
We create a function that listens for the completion of loading of myLoader. In other words, this function ("onLoad") will be executed when the entire image file is loaded.
At that point, it uses the "draw" function to copy the content of myLoader (which is the PNG image with the 8 frames) to the source Bitmap Data, but you can't see it, because we don't add it to the screen. If we did (eg. addChild(sourceBMP);sourceBMP.y=400;), it would look just like myLoader.
package {
import flash.display.Sprite;
import flash.display.Bitmap;
import flash.display.BitmapData;
import flash.display.Loader;
import flash.geom.Rectangle;
import flash.geom.Point;
import flash.net.URLRequest;
import flash.events.*;
public class tutorial extends Sprite {
public var sourceBD:BitmapData = new BitmapData(300*8, 200, true);
public var sourceBMP:Bitmap = new Bitmap(sourceBD);
public var targetBD:BitmapData = new BitmapData(300, 200, true);
public var targetBMP:Bitmap = new Bitmap(targetBD);
public var myLoader:Loader = new Loader();
public function tutorial()
{
addChild(targetBMP);
myLoader.contentLoaderInfo.addEventListener(Event.COMPLETE, onLoad);
targetBMP.y=200;
myLoader.load(new URLRequest("sprite.png"));
addChild(myLoader);
}
public function onLoad(event:Event):void
{
sourceBD.draw(myLoader);
}
}
}
Step 6 - copying the frame
Now we need to add the code that copies one frame at a time from Source to Target.
To do that, we declare a variable that will store the number of the current frame and a function executed whenever the user clicks on myLoader.
This function ("onClick"), copies a rectangle-shaped piece of source Bitmap Data to target Bitmap Data. This piece is the animation frame.
This line is the most important line of code in this tutorial. Please take some time to analyze the structure of the copyPixels function:
copyPixels(sourceBitmapData:BitmapData, sourceRect:Rectangle, destPoint:Point, alphaBitmapData:BitmapData = null, alphaPoint:Point = null, mergeAlpha:Boolean = false):void
It really boils down to (in human language, not AS3):
targetBitmapData.copyPixels(sourceBitmapData, sourceRectangle, destinationPoint)
The sourceRectangle is the current animation frame witin the spritesheet. You can ignore the alpha parameters for now - they are used for transparency effects.
package {
import flash.display.Sprite;
import flash.display.Bitmap;
import flash.display.BitmapData;
import flash.display.Loader;
import flash.geom.Rectangle;
import flash.geom.Point;
import flash.net.URLRequest;
import flash.events.*;
public class tutorial extends Sprite {
public var sourceBD:BitmapData = new BitmapData(300*8, 200, true);
public var sourceBMP:Bitmap = new Bitmap(sourceBD);
public var targetBD:BitmapData = new BitmapData(300, 200, true);
public var targetBMP:Bitmap = new Bitmap(targetBD);
public var myLoader:Loader = new Loader();
public var frame:uint=0;
public function tutorial()
{
addChild(targetBMP);
myLoader.contentLoaderInfo.addEventListener(Event.COMPLETE, onLoad);
targetBMP.y=250;
myLoader.load(new URLRequest("sprite.png"));
addChild(myLoader);
myLoader.addEventListener(MouseEvent.CLICK, onClick);
}
public function onClick(event:MouseEvent):void
{
targetBD.copyPixels(sourceBD, new Rectangle(300*frame,0,300*frame+300,200),new Point(0, 0));
}
public function onLoad(event:Event):void
{
sourceBD.draw(myLoader);
}
}
}
If you click on myLoader now, a new image should show up immediately below it:
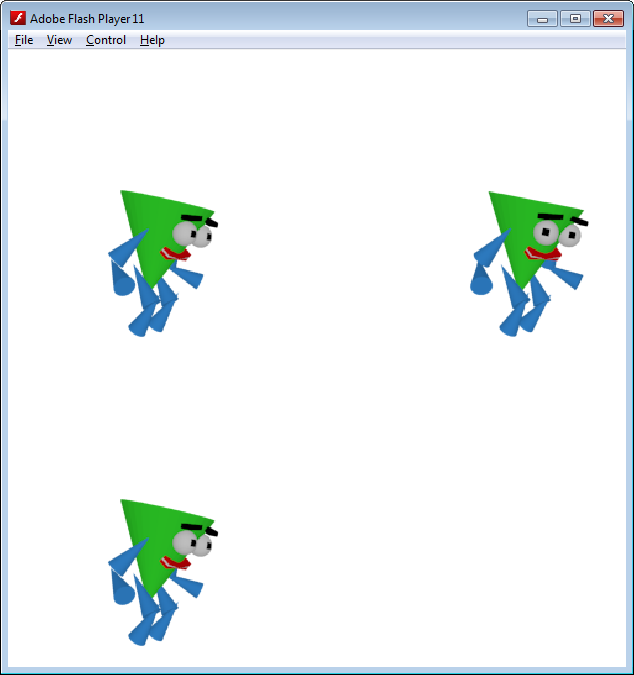
But it's not very exciting, nothing is moving yet!
Step 7 - changing the frame
So far the variable "frame" always has the value of zero. Let's add code in our onClick function to increment it by 1 each time. Additionally, if we run out of frames, the value is reset to zero and the cycle is repeated.
package {
import flash.display.Sprite;
import flash.display.Bitmap;
import flash.display.BitmapData;
import flash.display.Loader;
import flash.geom.Rectangle;
import flash.geom.Point;
import flash.net.URLRequest;
import flash.events.*;
public class tutorial extends Sprite {
public var sourceBD:BitmapData = new BitmapData(300*8, 200, true);
public var sourceBMP:Bitmap = new Bitmap(sourceBD);
public var targetBD:BitmapData = new BitmapData(300, 200, true);
public var targetBMP:Bitmap = new Bitmap(targetBD);
public var myLoader:Loader = new Loader();
public var frame:uint=0;
public function tutorial()
{
addChild(targetBMP);
myLoader.contentLoaderInfo.addEventListener(Event.COMPLETE, onLoad);
targetBMP.y=250;
myLoader.load(new URLRequest("sprite.png"));
addChild(myLoader);
myLoader.addEventListener(MouseEvent.CLICK, onClick);
}
public function onClick(event:MouseEvent):void
{
targetBD.copyPixels(sourceBD, new Rectangle(300*frame,0,300*frame+300,200),new Point(0, 0));
frame++;
if(frame==8)
frame=0;
}
public function onLoad(event:Event):void
{
sourceBD.draw(myLoader);
}
}
}
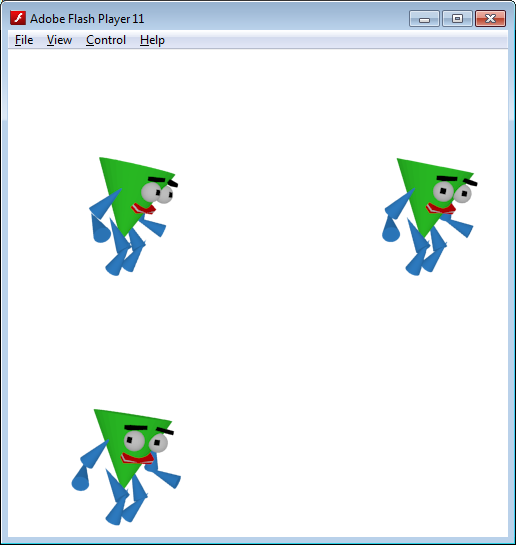
Finally! The lower image should be moving every time you click on the top image!
Here's a screenshot:
And the actual final Flash file (tutorial.swf):